Designed and painted by Brian Willis. Sets constructed by Sean Magee
Will be performed by Coleraine Provincial Players, (2010)
UPDATE 14TH AUGUST... Thus scene OK'd by the Producer.
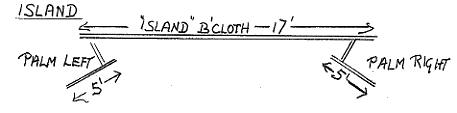
FINAL DRAWING OF PALM (Audience left)
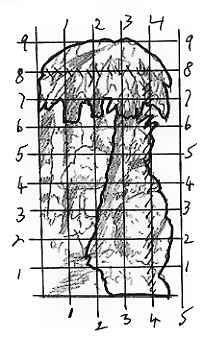
Then, when panels and supports are planned, the final drawing
is a layout of each Flat showing where each overlapping panel goes. On
this I then superimpose my one cms. square grid so that I know how to
lay out the panels when painting. This sketch shows a main 8'x4' panel
with two overlapped panels (outlined with a thick line.)
By the way I use a scale of one cms : one foot.
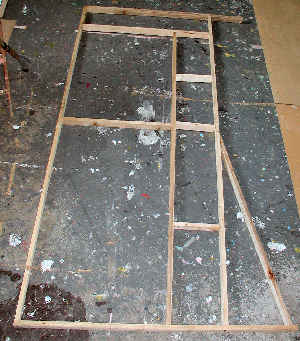
2" x 1" SUPPORTS
First of all here are the supports cut and screwed by Sean ready for the plywood panels. A weird photo angle taken from above with the wing laid on the floor.
If we were using hardboard we would nail triangles of hardboard in the corners for extra rigidity but triangles are not needed when using 4mm. plywood
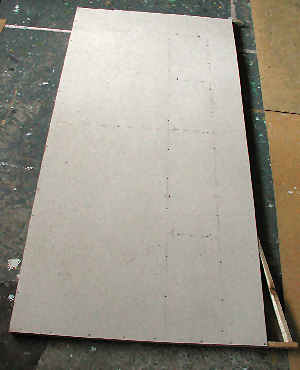
The plywood sheets we use are eight foot by four but I have designed these flats to be nine feet high by approximately five feet wide. So there has to be overlaps.
This photo shows the "main" 8'x4' sheet nailed permanently in position on the supports. (All panels are sealed and dried before nailing so they don't warp when I start painting them)
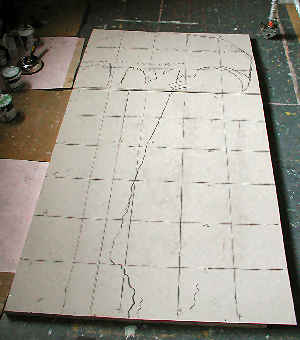
Now (bit complicated this) I lay the "overlap" sheets on top of the "main" sheet and tack them into their correct position using only a couple of nails on each sheet. The right hand sheet for instance starts at the dotted line which is 1'6" in from the left. And the "Top" overlap sheet starts 6 feet from the bottom.
I then draw on the one foot squares and- using these squares - transfer the important outlines from the original drawing (see thick outline on FINAL DRAWING above) .
Once satisfied I then remove these overlap panels and, using a powered jigsaw, cut out the overlap lines then nail them permanently into their position. The squares help me to align these. and also the nails where I tacked them originally. Note I do not cut out the edges at this stage. i.e. the top of the palms or the right hand edge of the flat. I don't cut out these edges until the painting has been completed. Doing it this way enables me to be more artistic with my painting without being constrained by cut out edges.
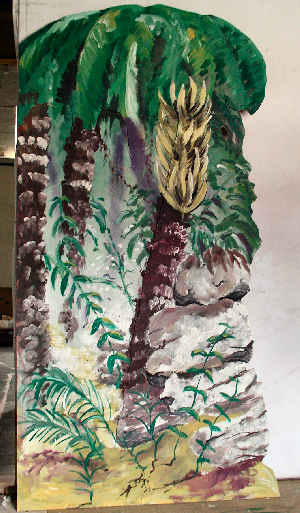
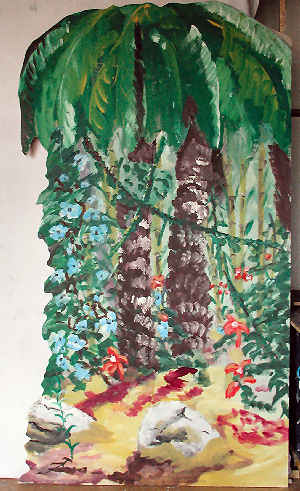
And here is the finished flat, painted with the edges cut out. Yes I know bananas don't hang on the tree when they are yellow. They should be green but green would have looked too boring... any way this is a pantomime. Also bananas don't grow on palm trees like this either.
Note the vague misty background. Before painting I markd out the outlines with charcoal then "reserved" the edges of the trunks with masking tape. I then painted in my misty background. Then, with the paint still wet, took off the tape to reveal the positions of the trunks. With the background paint still wet I then hinted at trunks in the distance melding into the atmosphere.
I waited until the background paint had dried before painting in the rest of the picture with hard edges.
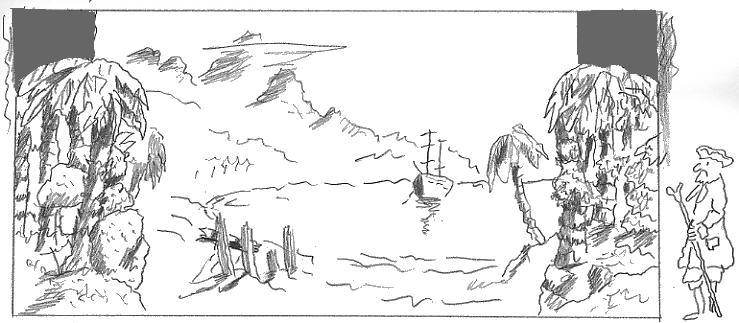
The rocks are part of the script as the 'baddies' hide behind these.
You can just trace the outline of the edges of the two overlaps (Only because you've seen the drawings!)
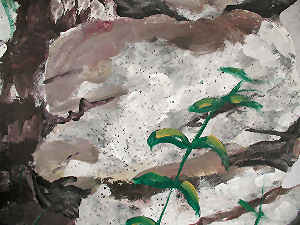
ROCKS
Here's a close up of the "rocks". I first of all put on a base
colour, then dabbed on other similar colours with a broken sponge darkening
the shadow areas . Then I laid the Flat flat on the floor and splattered
dots of dark paint over the entire rock surface. Once dry (so the dots
don't run) I lifted the flat back up into an upright position and put
in the cracks and last of all the plant to give it depth.
COMPLETED AUDIENCE RIGHT PALM
And, for your interest, here is the other side of the stage wing.
This "Island" scene will be used twice. Once is when the cast arrive on the island and the second time to represent the "Chief's Camp" which is supposed to be on a separate part of the Island. But in order to save time, money, storage (to name but a few reasons) we are going to use most of the same set.
The Audience Left palm (Banana one) will be changed but the right hand one seen here will remain. So I have deliberately made it vague and unmemorable. Although I have livened it up with colourful flowers.